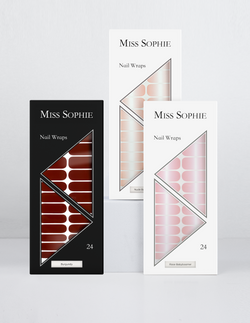
Nail Wraps are the perfect alternative for nail polish or gel nails. Depending on the occasion, season or mood, you can conjure up the perfect DIY manicure from the comfort of your own home. Simply choose a design, stick on the matching size, fix it and enjoy perfect nails for up to 14 days.
Nail Wrap Tips your DIY Manicure
Maybe you have just discovered our Nail Wraps for yourself or maybe there are some hiccups when applying, fixing or removing the Nail Wraps.
To make sure you get the most out of your Nail Wraps, we've put together the best hacks for troubleshooting. Let's go!
Problem 1: The Nail Wrap does not stick properly

In order for the Nail Wrap to adhere perfectly to the nail, the nail plate must first be degreased and cleaned. For this, you can use a nail polish remover. Acetone-containing nail polish removers degrease extra strongly.
If you have sensitive nails or change the Nail Wraps frequently, you can use a milder product like our Nail Wrap Remover and apply the Base Coat afterwards.
Hack: When removing the Nail Wrap from the backing paper, make sure that your fingers are free of grease and that you touch the adhesive side as little as possible.
Problem 2: The size of the Nail Wrap does not fit
Each Nail Wrap set contains different sizes. If you are in doubt, always pick the smaller size. A small space must be left between the Nail Wrap and the cuticle, as the Nail Wrap would come off early if accidentally stuck to the cuticle. Cut the Nail Wrap while still on the backing paper with nail scissors so that it fits perfectly to your nail shape. This way, the Nail Wrap holds well and the result also looks particularly natural.
Hack: With transparent tape you can easily make a template for the perfect Nail Wrap size.
Problem 3: Bubbles appear under the Nail Wrap after it has been fixed

Less is definitely more when it comes to fixing our Nail Wraps. Please apply only a thin layer of Top Coat. A thick layer could cause small bubbles to form and the Nail Wrap may come off.
Hack: Also seal the nail edge with a thin layer of Top Coat to prevent any moisture from softening the natural nail.
Problem 4: The Nail Wrap does not lie properly on the nail bed

When applying the Nail Wrap, make sure that you smooth it thoroughly and also press the edges firmly. Also neatly paint the area where the natural nail meets the Nail Wrap (but not the cuticle).
Hack: If the Nail Wrap grows out a bit after a few days together with the nail, you can refresh the sealing. Simply apply another thin layer of Top Coat to the Nail Wraps so that the small gap between the cuticle and the Nail Wrap is also covered with Top Coat.
Problem 5: The Nail Wrap looks uneven

The Nail Wrap is perfectly in place, but the surface doesn't look completely even? If you have fine ridges on the nail, you might want to prepare your natural nails well before applying the Nail Wraps.
Hack: First, gently smooth out fine unevenness with a buffer. Then apply our Base Coat for an extra even nail surface. The Top Coat fixes the Nail Wrap and evens out the nail surface, too.
Problem 6: Nail Wraps are difficult to remove

You want to remove your Nail Wraps, but somehow it doesn't work out as easily as you thought it would? No problem! With our Nail Wrap Remover, Top Coat and Nail Wraps will be removed gently but thoroughly.
Hack: Soak a cotton pad with Nail Wrap Remover and cut it in half. Place a cotton pad piece on each nail and then put a finger clip over each finger – you may know these clips from the nail salon. These are small "caps" for the fingertips, similar to finger cots.
Alternatively, press the cotton pads gently onto the fingertips or fix them with a rubber band. Now let the remover work for a while. Then remove the pads from your fingers, soak a new cotton pad with Nail Wrap Remover and simply wipe off the Nail Wraps.
We wish you much success with your DIY manicure and would love it if you shared a photo of your nails with our Nail Wraps on Instagram using the hashtag #MissSophieLove and tag us in the photo!


